How to Reset Sony Headphones: A Comprehensive Guide for All Models
In this comprehensive guide, we’ll take you through the simple yet effective steps to reset Sony headphones, whether you own the WH-1000XM3, WH-1000XM4, WH-1000XM5, WH-XB910N, WHCH710N, or WH-CH720N from Sony’s impressive lineup. Say goodbye to those pesky connection hiccups, audio imbalances, or unresponsive touch controls, as we walk you through the troubleshooting process that will have your Sony headphones performing at their best once more. Get ready to rediscover your favorite tunes in crystal-clear clarity and enjoy an uninterrupted auditory journey with your Sony headphones.
Table of Contents

How to Reset All Sony Headphones: Simplified Guide
While Sony offers a wide array of headphone models, each with its unique design and controls, there isn’t a universal reset method for all of them. However, a general reset method applies to most models, such as:
- WH-1000XM3
- WH-1000XM4
- WH-1000XM5
- WH-XB910N
- WH-CH710N
- WH-CH720N
- INZONE H7/H9
Here’s how to reset your Sony headphones to their factory settings:
- Power off your headphones by pressing and holding the power button for around 3 seconds until the indicator light goes off.
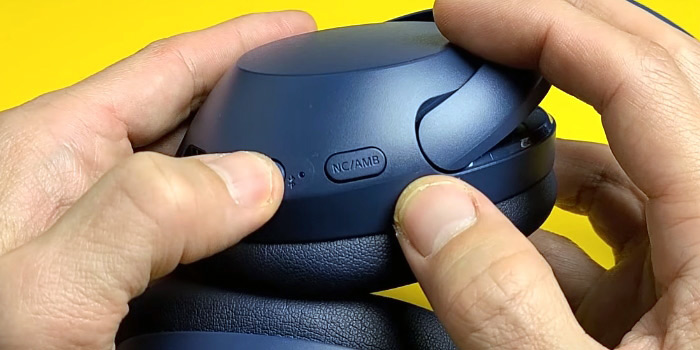
Screenshot from YouTube, @WorldofTech
- Simultaneously press and hold the power and noise-canceling buttons for roughly 10-15 seconds until the indicator light flashes blue four times.
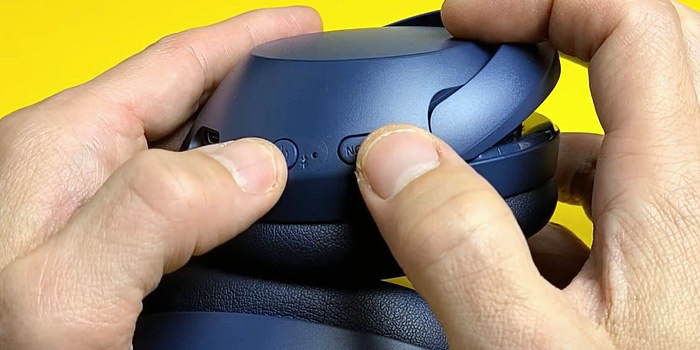
Screenshot from YouTube, @WorldofTech
- Release the buttons once the indicator light stops blinking.

Screenshot from YouTube, @WorldofTech
- Reconnect your headphones to your device, and they should now be reset to factory settings.
If you prefer to retain your pairing information and user settings and merely restart the headphones, you can follow these steps while the headphones are charging. Sony’s website provides separate instructions for resetting and initializing headphones. Resetting merely restarts the headphones, while initialization restores them to factory settings.
How to Reset Sony WH-1000XM4
Resetting the Sony WH-1000XM4 headphones can be a bit tricky due to the unique button layout, including the Custom button. By default, the Custom button switches between active noise cancellation (ANC) and ambient sound with a single press and optimizes ANC with a long press. However, you can customize its function using the Sony Headphones Connect app. Donwload: Google Play / App Store.
Here’s how to reset Sony WH-1000XM4 headphones:
- Turn off the headphones by holding the power button on the left ear cup for approximately 2 seconds until the indicator light goes off.
- Simultaneously, press and hold both the Custom button and the power button for about 7 seconds until the indicator light flashes blue four times, indicating a successful reset.
- Release the buttons and wait for a few seconds.
- Power on your headphones and reconnect them to your device.
If you’re interested in a more compact TWS option with exceptional quality, be sure to read our review of the Sony WF-1000XM4 earbuds to discover their impressive features.
This video shows the instructions on how to reset your Sony WH-1000XM4:

How to Reset Sony WH-1000XM3
Resetting the Wireless Headphones WH-1000XM3 involves a straightforward process with three steps.
- Begin by inserting the USB cable into the headphones to initiate the charging process.
- While the USB cable remains connected, simultaneously press the Power Button and the NC/Ambient button.
- The headphones will reset. To resume charging after the reset, simply disconnect and then reconnect the USB Type-C cable.
This uncomplicated method ensures a quick and efficient reset of your WH-1000XM3 wireless headphones.
To make sure to reset your WH-1000XM3 headphones watch this video:

How to Reset Sony WH-CH510 and WH-CH520 Headphones
Resetting Sony WH-CH510 and WH-CH520 headphones, popular choices for those seeking entry-level Bluetooth headphones, is a straightforward process tailored to their features, which lack ANC or Custom buttons found in Sony’s higher-end models.
To reset the Sony WH-CH510 and WH-CH520 headphones:
- Press down the power button for approximately 2 seconds to turn off the headphones.
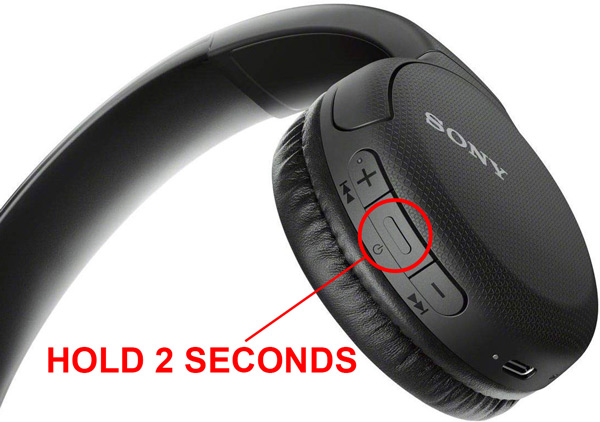
- Simultaneously, press and hold the power and volume down buttons for around 10 seconds or until you observe the indicator light flashing blue four times.
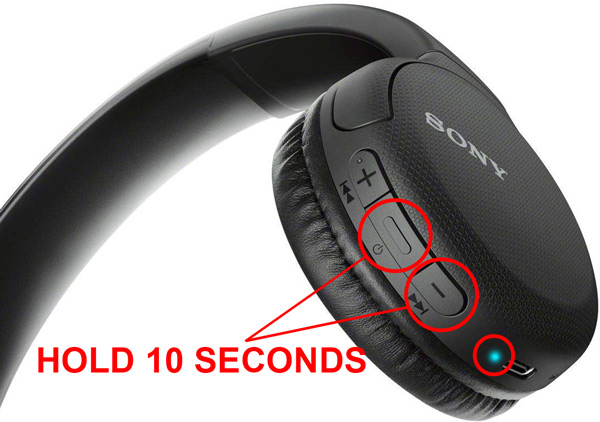
- Release the buttons and wait a few moments.
- Power on the headphones and re-establish the connection with your device.
This simple method ensures the effective reset of your WH-CH510 and WH-CH520 headphones, restoring them to their default settings.
How to Reset Sony MDR-1000X Headphones
Resetting the Sony MDR-1000X headphones is slightly distinctive due to their unique button configurations on the ear cups. Specifically, they feature dedicated buttons for both noise cancellation and ambient sound, which might be perplexing for some users during the reset process.
To reset the Sony MDR-1000X headphones, follow these steps:
- Press down the power button for approximately 2 seconds to turn off the headphones.
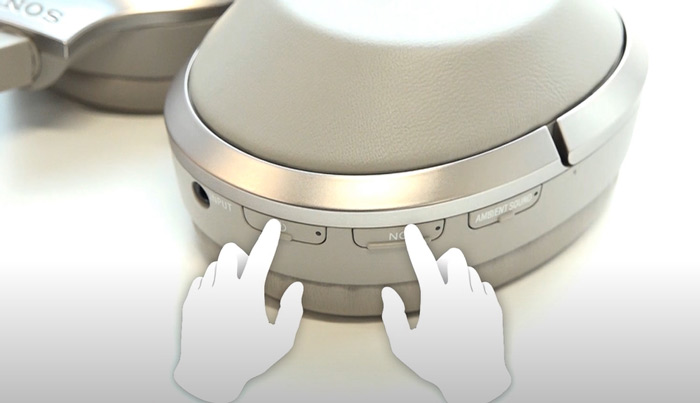
Screenshot from YouTube, @Sony Korea
- Simultaneously, press and maintain the power button and the Ambient Sound button for approximately 7 seconds, or until you witness the indicator light flashing blue four times. This signifies that the headphones have successfully undergone a reset.
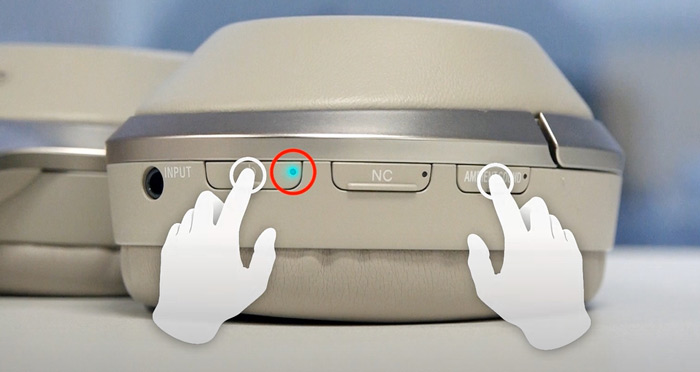
Screenshot from YouTube, @Sony Korea
- Release both buttons and await a brief moment.
- Power on the headphones and proceed to re-establish the connection with your device.
By following these instructions, you can efficiently reset your Sony MDR-1000X headphones, ensuring they return to their default settings.
How to Reset Sony INZONE H7 and H9 Headphones
Resetting the Sony INZONE H7 and INZONE H9 headphones is tailored to their gaming-oriented design, featuring distinct button layouts and indicator lights compared to typical Bluetooth headphones.
To reset the Sony INZONE H7 and H9 headphones, follow these steps:
- Press down the power button for approximately 2 seconds to turn off the headphones. Ensure that you also unplug the USB-C cable.
- Simultaneously, press and hold both the power and Bluetooth buttons for a minimum of 10 seconds or until you observe the indicator light flashing white four times. For the INZONE H9, these indicator lights are located at the end of the headband on each ear cup, while the INZONE H7 has its indicator light at the bottom of the right ear cup.
- Release the buttons and allow a brief pause.
- Power on the headphones and proceed to reconnect them to your device.
By following these instructions, you can effectively reset your Sony INZONE H7 and H9 headphones, ensuring they return to their default settings, ideal for your gaming experience.
This video tutorial will help you reset your Sony INZONE H7/H9:

Troubleshooting Guide
Experiencing difficulties in resetting your Sony headphones? Don’t worry; we’ve got you covered with this comprehensive troubleshooting guide. Whether it’s unresponsive buttons, connectivity issues, or other challenges preventing your headphones from resetting, follow these steps to resolve the problem and get your Sony headphones back to their default settings.
Recharge Headphones
If you haven’t charged your headphones in a while, there’s a good chance their battery level is low or depleted. An insufficient battery charge can prevent a successful reset of your headphones. So, here is what you might do to perform a successful reset:
- Ensure your headphones are sufficiently charged before attempting a reboot.
- Use an AC adapter and connect it directly to a wall outlet for about 3 hours to ensure proper charging.
- Sony headphone charging times may vary, typically between 3 to 4.5 hours, depending on the model.
- Some headphones mentioned in this article support a 10-minute fast charging option with an AC adapter, delivering up to 5 hours of playback on a quick charge.
Tips on charging your Sony headphones models:
- We do not recommend using a laptop or PC USB ports for charging as their power output may be inadequate.
- During the charging process, the indicator light on your Sony headphones should remain a consistent red color.
- Sony headphones incorporate an overheating warning feature during charging.
- Depending on the specific model, you may observe the indicator light flashing red twice consecutively, turning orange, or not illuminating when the headphones encounter abnormal temperatures during charging.
- In such instances, disconnect them from the charger and allow them to cool down before attempting to charge them again.
Use Customer Support
If your headphones remain unresponsive despite a full battery, hardware issues may be the cause.
- Contact Sony’s customer support for repair or replacement, even within the one-year limited warranty period.
- Proof of purchase, typically included in the headphone’s packaging, is necessary for warranty claims.
- Out-of-warranty repairs are possible, but they may incur costs, with some users reporting fees of up to $200 based on the issue’s severity.
- To reach Sony’s customer support:
4.1. Visit Sony’s customer support page and select “headphones.”
4.2. Choose your preferred method of communication, which includes live chat, agent chat, a direct call, or awaiting a customer service agent’s call.
Opting for live chat is recommended for a seamless communication experience without leaving the support page.
DIY Hardware Fix
Consider DIY hardware repair as a cost-effective alternative to expensive out-of-warranty repairs.
- Be aware that there are risks involved in DIY repairs, as you may inadvertently damage other components.
- Only resort to DIY hardware repairs if your headphones are out of warranty and you have no other viable options.
- Some headphone issues, such as shorts caused by wire contact with the motherboard, can be addressed through DIY repair.
To investigate and potentially fix this issue, you will need the following tools:
- Plastic pry tool;
- Small screwdriver.
Follow these steps for the repair:
- Place the headphones on a flat surface with the earpads facing up.
- Use a prying tool to remove the ear pads from the left ear cup (on your right side).
- Remove the speaker cover mesh.
- Take out the four small screws securing the ear cup.
- Flip the headphones over and remove the outer cover.
- Gently disconnect the touch panel connector.
- Inspect the wires to see if they are touching the exposed motherboard.
- If there is contact, lift the wires and cover the exposed motherboard with electrical tape.
Here are some examples with DIY Repair Manual:

FAQ
Conclusion
Now you have mastered the procedure on how to reset Sony headphones. It is a valuable skill that can come in handy when troubleshooting various issues. Whether it’s connectivity problems, unresponsive touch controls, or the need for a fresh start, the step-by-step methods we’ve explored in this guide empower you to reclaim the full potential of your Sony headphones.
Remember to consult your headphone’s user manual for model-specific instructions and, when in doubt, don’t hesitate to reach out to Sony’s customer support for expert assistance. With the right knowledge and a touch of patience, you can enjoy uninterrupted, high-quality audio experiences with your Sony headphones.